A bridge to an end

Posted in Acorn House on January 3, 2019 by acornhouseworkshop

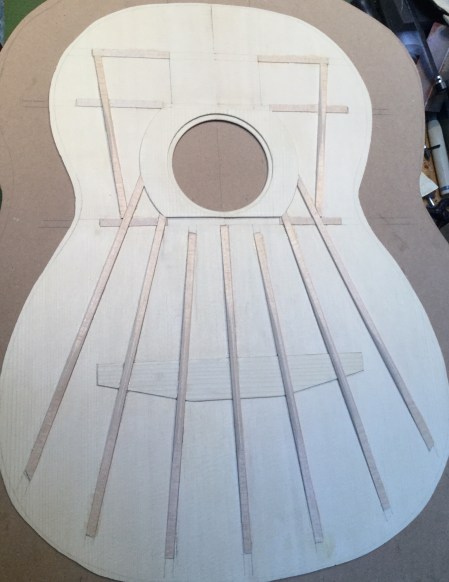
Before the finish goes on, the last bit of woodworking needs to be done: the bridge. While the steel string world has seen a myriad numbers of bridge designs over the years, the classical world has been far more conservative. While a few builders have experimented with new designs, the majority stick to the traditional model.

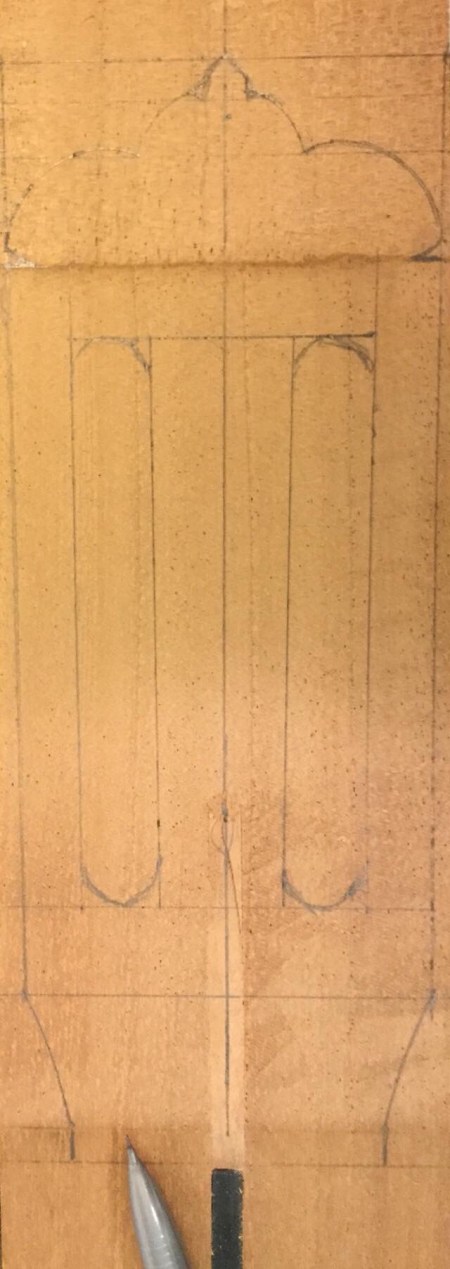
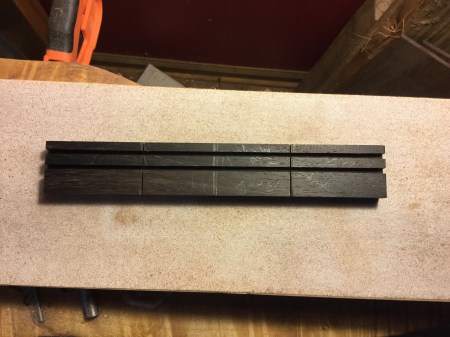
It all starts with a blank cut to size. Here, the traditional material is Rosewood. While ebony is usually used for fingerboards, it is to dense and heavy to provide the most efficient transfer of the classical strings’ energy. I’m starting with a wonderfully dark blank of Brazilian Rosewood, marked at the center.

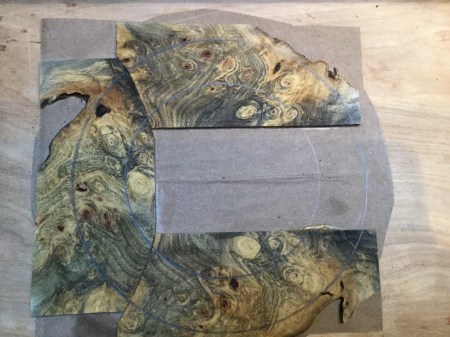
Before doing anything else, the bottom needs to be contoured to match the arch of the top where it will go. If this isn’t done, it will try to compress the top arch to match a flat bottom, and always be an area of tension, as well as compromising the neck angle that was designed in from the beginning. Using scrapers and sandpaper taped to the top results in a perfectly matched arch.

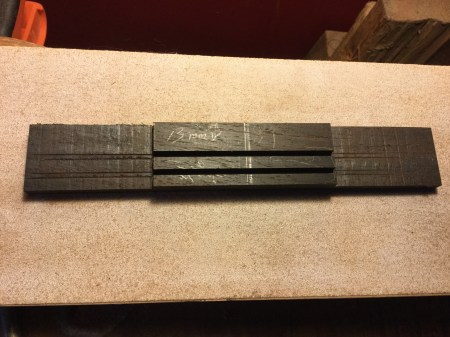
Then the blank goes to the table saw to cut the grooves for the saddle and gully. A handsaw takes care of the edges of the center.

Then the sides are cut to the lower thickness.

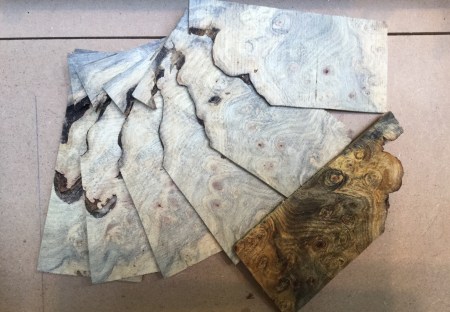
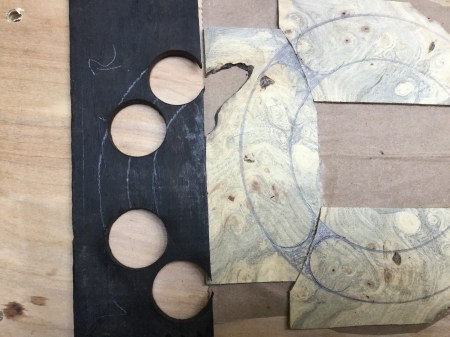
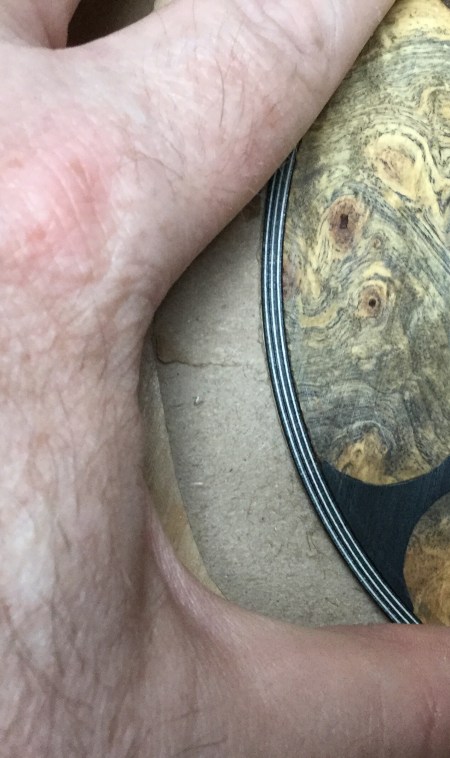
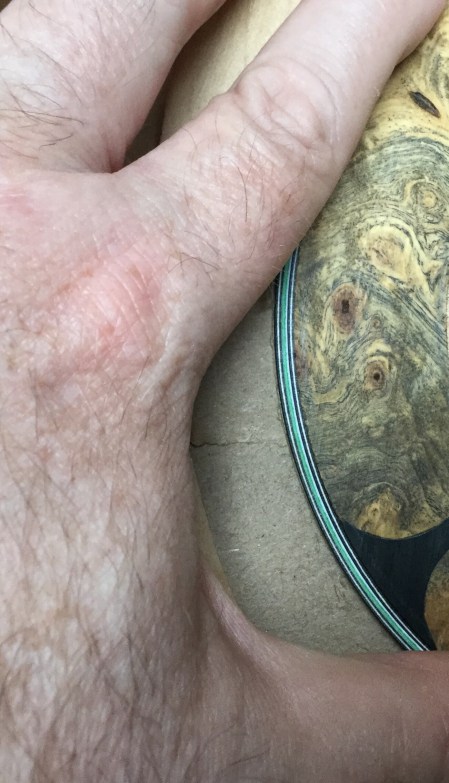
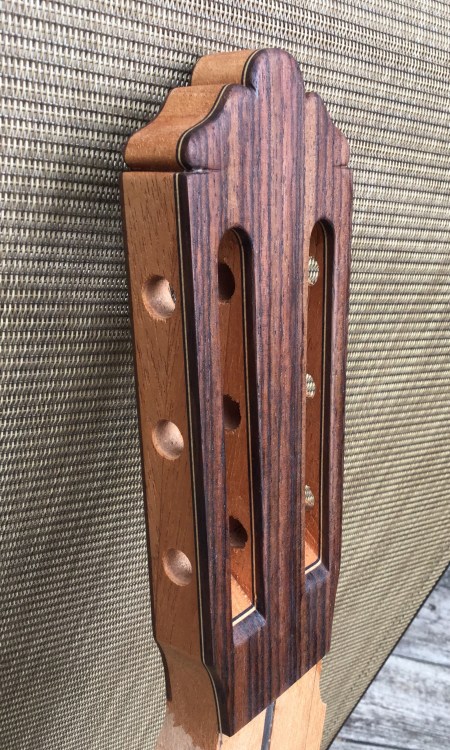
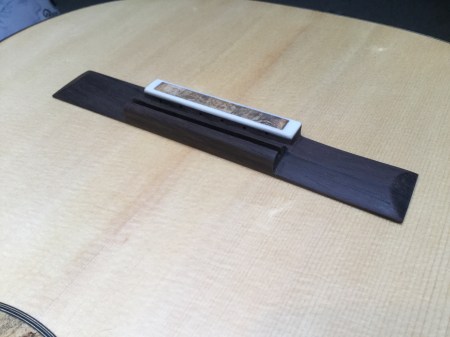
Holes are drilled in the tie block for the strings. The tie block then needs some type of harder material to protect the wood from the strings. This can be either two strips of bone on the edges, or a more elaborate treatment. I went elaborate. Using a wide strip of bone, the inside is cut out and more Buckeye burl is inlaid. Then the assembly is glued to the lowered top of the tie block.

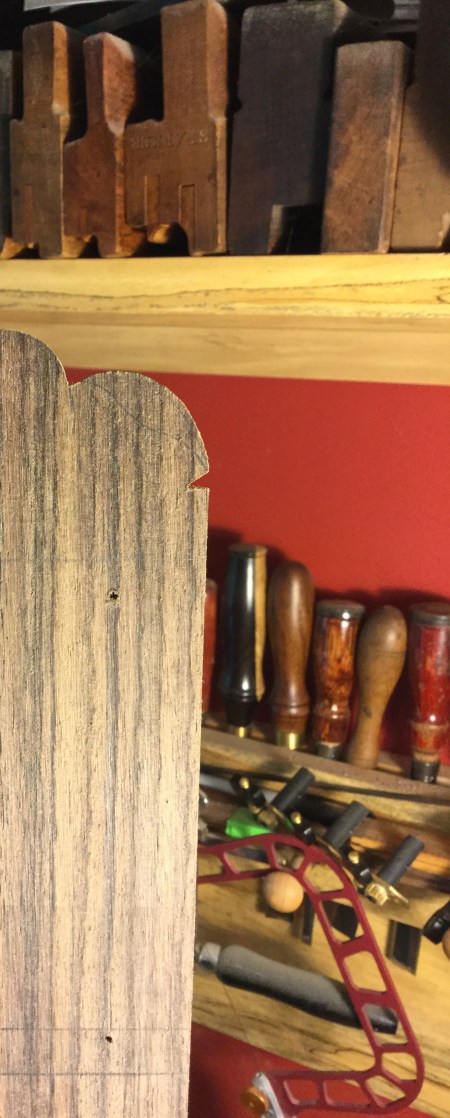
Next, the sides get shaped using files and sandpaper; first with a top radius.

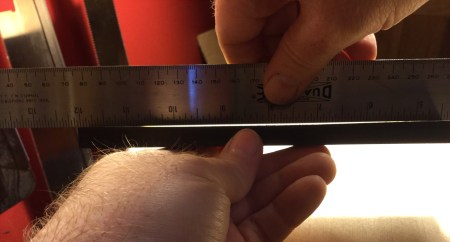
Both sides need to match, so calipers and eyes are critical. Then the ends are ramped and the saddle surround is shaped.

Now the bridge is ready for finishing, unlike a steel string bridge which rarely has anything more than oil. The classical bridge gets the same gloss finish as the body, whether it is finished on the body, or off.

Parlez-vous Français?

Details, details…

Posted in Acorn House on October 13, 2018 by acornhouseworkshop

With the box closed up, some decorative, but functional, details need to be tended to. The major one, that causes the most night sweats, is routing the binding channels. After all the work so far, one little slip of the router, one grab of a weak grain, can ruin everything. Plus, with the Spanish heel construction, you have to work around the attached neck, and do some delicate handwork to bring the channels into the neck. No pics for that procedure, I was too focused on the doing to do any recording. Suffice to say, I, and the guitar, survived.

Bending the binding, on the other hand, proved to be ridiculously easy. The rosewood’s grain was straight, and it seemed eager to conform to the guitar’s curves. I chose some simple black and white alternating purfling lines to accompany it, white-black-white-black on top, and white-black-white on the back. This, with the rosewood binding with just a maple line, gives a very clean, modern look, with no unduly extravagant ornamentation.

One thing I decided to do differently on this guitar, is to inlay the end graft after putting the binding on. Typically, this would go on first, and the the accent lines would connect with the binding’s accent line(s). But I want to use more of the buckeye burl to form a sort of mini framed picture that extends over the binding. So I used some purfling to frame the rectangle of Buckeye.

Then, after routing it’s shape into the end of the sides (snapping a too-small bit in the process, and having to wait for a larger replacement to arrive), the framed “landscape” was glued in, tying in with the soundhole rosette.

Next, the fingerboard was tapered, and the end shaped. Most classical guitars have 19 frets, but some add an extra fret for the high string, allowing a high-C for those pieces that need it. This added outcropping requires a partial fret slot hand cut.

After the fingerboard is glued on, the neck can receive its final carve, the bridge made, and the guitar finished. All after much sanding.

And sanding.

And sanding.

A little dental work

Posted in Acorn House on July 31, 2018 by acornhouseworkshop

With the soundboard finished, it’s time to start a little assembly.

Classical guitars have a different structure to steel string acoustics, and therefore the order, and manner, of assembly is, at least traditionally, a little different. (Some modern builders have taken to doing a more steel string type construction for their classicals; and vice versa.) The soundboard is first attached to the neck, being careful to keep the centerlines aligned. This subassembly is clamped down to the solera and, after the sides are bent, the outer molds are bolted to the solera and the sides let into the Spanish heel.

To attach the sides to the soundboard, little triangular pieces called tentellones, or peones, (or tantalones, or dentelones, etc) are made, along with the end block, from some Spanish cedar.

The tentellones are glued in, one by one, with hot hide glue, needing only finger pressure for a minute or so to clamp them in. This method is a slow, but rather easy way that results in a very secure attaching of the sides; certainly without the time stress and clamping difficulties of using a solid lining kerfing strips. There are two ways to space them; some will leave even gaps between each piece, I used the other way of putting them as close as possible, with minor variations due to the individuality of the cutting of each piece and the curve of the sides.

You can see the side braces that press on the harmonic bars, locking everything together. After a few hours (with breaks as needed, one other advantage of this method) the soundboard is solidly attached to the sides.

The back is attached using kerfing strips, more specifically the reverse kerfing strips I prefer. Since they don’t need to be glued on two surfaces at once, it’s easy, and quick, to clamp them to the sides with reinforced clothespins (a rubber band is wound round the jaws to provide a tighter grip).

Next up, closing the box.

Hidden beauty

Posted in Acorn House on July 1, 2018 by acornhouseworkshop

With the rosette in, work begins on the other side of the soundboard, the side that actually means something. First, the soundboard needs to get it (almost) final thicknessing (the final prep for finishing will take a little more off.) My goal is a nice light 2.5mm, thin enough to become translucent under light, but not thin enough to lose its structure. (Sorry America, the classical guitar world uses the metric system exclusively.) This will vary according to the stiffness of the wood.

Then the bracing pattern can be drafted underneath. The standard classical guitar bracing pattern was established in the middle of the 19th century by Antonio de Torres; with luthiers adding their own variations ever since. Recently there has been some completely different designs, but the classic is still the most widely used. I will be following a combination of Jeffrey Elliott and Robert Bouchet, both of whom derive from Torres’. The first component to go on is the soundhole reinforcement. That big hole is the biggest weak spot in the top, especially with half of its thickness being taken by the rosette, so it is critical that it be supported.

Everything else has to be done in order, since there will be some parts that will be going over other parts. The next critical reinforcement is under where the bridge goes. While there is much less tension with a classical’s nylon strings, vs. a steel string guitar, there is force aplenty to pull the soundboard into distortion. So, on goes the bridge plate.

One element that both Elliott and Bouchet have in common in their designs, is open harmonic bars, basically open ares in the upper horizontal bars. (Something that Torres also experimented with.) However, these openings can then be a point of weakness, so one innovation that Elliott devised, was to place very thin strips at these openings. Being only 0.5mm thick, they do not inhibit any vibrations, but they add enough reinforcement to counteract that weakness. They are almost as thin as the fine pencil lines.

So, these are next to go on.

With those on, the fan braces can be added. I drew them to radiate from the point at the 12 fret where the neck joins the body. They will cross over the first bits wherever they intersect. They are 6mm wide, and will range from 6.5mm to 5mm high. While classical and acoustic guitars appear to be flat on top, there is actually a slight rise at the bridge. This dish is built into the workboard as a concavity, and each fan brace must be be fitted to match it. Compare the shape of the fitted brace, with the straight drawn line next to it and you can see this radius.

With each brace crossing the dish from a different angle, the individual fitting is the most time consuming. After conforming to the dish, they are then notched to over the bridge plate and thin reinforcement strips. Eventually, all 7 are glued on. (I’m using hot hide glue for all of the bracing, by the way.)

Out come the wee little planes and paring chisel to shape the fan braces, starting with the planned heights, then profiling them, finally ramping them down on each end.

The two upper fans are next; fitted, glued, and carved.

Now the open harmonic bars can go on. The open areas allow vibrations to go into the upper part of the guitar while providing the strength under the fingerboard. They are notched to go over the tips of the thin reinforcement strips.

A couple of other reinforcements, and the bracing is done. A light, but strong, under structure that will, sadly, never be seen by most.

Siding next.

A burly circle

Posted in Acorn House on June 28, 2018 by acornhouseworkshop

With the neck shaped as far as it will go before assembly, it’s time to give the soundboard it’s face. I’m using a very resonant soundboard made from Italian spruce harvested from the Val di Fiemme; the same forest that Stradivari used for his wood (although his wood was decidedly more old growth.) This wood rings with potential, and is very stiff.

For the rosette, I decided to use some buckeye burl I had left over from a bowl I turned. The slices I was able to get revealed a beautiful, complex combination of shapes, swirls, and shades (I’ve wiped one slice with mineral spirits to show its finished appearance.)

After gluing 2 pieces of craft paper (for ease of removal), I laid out the rosettes inner and outer diameters, and started laying out the slices.

With all 3 pieces on, I redrew the circles. The unfilled area will be hidden under the fingerboard, no need to waste good burl.

If you can see the way I butted the pieces up to each other, my original plan was to have an arc of black to hide/emphasize the seams. A good night’s sleep revealed a better idea. Using some ebony, I drilled some holes to end up with small, double arc’d, bits.

These were then inlayed between the burls and the border circles were routed.

Next, I had to decide how to frame the burl. I experimented with various combinations of purfling, using black, white, and even green lines.

While I like the way the green brightened things up, in the end, I went with a variation of black and white. If I had used either of the green variations, the rosette would end up being far too wide, and the soundhole would have to get for too small. Alternately, I could have had the purfling go into the burl area, but, the burl was kind of the whole point; I wanted to keep as much of it that I could. I did vary the thicknesses of black to add some dynamic to it.

So, the burl was inlayed into the soundboard, with some Sitka spruce scrap filling in the area underneath the fingerboard.

Then, channels were routed for the purfling and it was glued in. After leveling the burl and purfling, a couple of voids in the burl were filled, and the soundhole was finally cut. The top was shellacked to bring out the burl, as well as protect the top during the rest of the construction.

Its a more modern take on the traditional classical rosette, which is made up of repeating mosaic tiles, with many surrounding purfling elements, but one that I prefer.

Brace yourselves, next up is the bracing!

Getting a head start

Posted in Acorn House on June 6, 2018 by acornhouseworkshop

This summer’s main project is a classical build. Since the traditional neck to body joinery is a Spanish heel, with the sides let into slots cut in the heel, the construction timeline dictates that the main parts of the neck need to be done first. So, after gluing up the rough blank from Spanish cedar, the design of the headstock starts. I tried to draw upon various models from the classical tradition, as well as incorporating elements from my own previous headstock designs. So, I came up with this:

Since there is typically no inlay in a classical headstock, it is the shape itself that is the hallmark of the builder. Being satisfied with this design, I glued on the overlays (and underlay), and began to rough cut the outline. An errant saw cut got too close to the little tip at the top, which meant a redesign was required. At first I was going to go with a three lobe design, using the original idea, just without the tip. But, after refining it closer, I could see that that wasn’t going to work.

So, I added some curves to the outer lobes; again, drawing inspiration from historic builders.

That resulted in a design that I liked even better than my original concept.

Next, the tuner post holes were drilled, and the access slots were drilled, cut, shaped and ramped. Some finish sanding and a little shellac to seal everything and show the true color of the Rosewood, and the head is finished.

Now, to move from head to toe.

Feature Presentation

Posted in Acorn House on November 14, 2016 by acornhouseworkshop

A little interview/performance I did about my work.

Necking

Posted in Acorn House on June 28, 2016 by acornhouseworkshop

There are many ways to create an instrument neck. My method will vary depending on what size neck I’m making, and what wood I have available. For the mandola, I went with a laminated neck in order to get the best grain orientation, and the maximum strength.

So I first glued up a curly maple—walnut—curly maple sandwich. Then, after the glue had well dried, I cut and faired the headstock angle. I don’t do any other cuts at this point, in order to make the next steps that much easier. I leave it long on both ends until the truss rod is installed. I will size it according to the scale length.

image

With the channel for the truss rod cut at the table saw, I also rout out channels for some carbon fiber reinforcing strips; truly a belt and suspenders approach. Then I can install both the truss rod and CF strips. The truss rod gets a strip of walnut glued in over it, encasing it in the wood.

image

Now the neck can be rough sawn at the band saw, and the V-joint tenon cut at the heel on the table saw. With those cuts made, I use some of the offcuts to make two wings to make the headstock wider.

image

image

While the glue is drying, I go to work cutting the inlay from a mother of pearl blank and inlaying it into the headstock overlay. This is then glued to the headstock’s face.

The back of the headstock now gets sanded to thickness, leaving a little curve at the juncture of the neck for forming a volute, giving a little more wood where the truss rod pocket is. On this I glue a walnut veneer, providing yet more strength. The whole headstock now gets routed following the template.

image

image

With all the wood on, now is the time to start actually carving the neck. I start with the volute, getting it to a pleasing curve.

image

Then its just a matter of working the wood down the neck until it feels right; rechecking for any bumps or off spots. The curly maple is a little less friendly than mahogany to work on, but you just have to keep on whittling away with knife, spokeshave, rasp, file, sandpaper, and scraper. Whatever works best, going from coarser to finer.

P1040427

After fitting and attaching the neck joint and gluing on the fingerboard (down the road) the final sanding to a glass smooth surface will be done.

Hm… a glass neck. I wonder how that would work?…..

Arch-villain

Posted in Acorn House on May 31, 2016 by acornhouseworkshop

One of the most intimidating task in making a mandola, mandolin, or really any instrument with a carved arched top, is taking a solid piece of wood, and carving the convex top and a concave back to match. I start with a bookmatched wedge of spruce, Adirondack in this case, and, after flattening the bottom, I mark out the rough contours and use a router to hog off a good part of the wood.

P1040395

This gives me a good platform to start carving, and save me a lot of grunt work. Next, I break out my large(ish) instrument makers plane. These little hand planes, also called thumb planes, were first develop for violin makers, but when archtop guitars and mandolins started being mad, they found another, albeit very similar, group of users. With the thumb plane, I start to connect the terraces into a smooth arch.

P1040398

Until, finally, I have an approximation of the final contour, still a little rough, though; creating a nice pile of hamster bedding in the process.

P1040400

At this point, its time to refine the curves, and make sure I’m getting the arcs I want. So, I make some cross section templates at important points, like the bridge, and where the soundholes start and end, as well as down the middle. Since my last mando build, I’ve found that they are much easier to use if they are solid, so, instead of just using stiff poster board, I transferred them onto wood.. Plus they’ll be ready to go for any future mandola builds. They won’t go tight to my curves until the recurve is finished (which I won’t do until much later), but I can still see how much I match the ideal by looking for a consistent gap.

P1040401

With the rough arches planed, now I turn to my two tiny block planes, to smooth out the curves, removing the mark of the curved bottom thumb plane.

P1040403

Next, come the double curved planes to start working on the transition to the recurve.

P1040404

Scrapers step in to help smooth out those planes’ marks.

P1040405

Finally, an orbital sander gives a final smoothing of all tool marks, and blends the surface into one.

P1040419

To get the inside to match the outer curves, I set up a jig at the drill press that will register of the newly created top surface, and drill down to within 1/4″ of the top. This gives me an indication of when to stop carving, at least for the rough out.

P1040409

Then, a gouge hogs off the bulk of the wood, before the thumb plane again steps in to plane down until the drill bit holes disappear. The I know I’m 1/4″ from the outer surface, and I can begin more refined planing, as before, with the goal to have the thickest part where the bridge will rest, going thinner as it approaches the rim. The thinnest part will be at the recurve, which may be as thin as 3/32″. That allows the mandola’s top to react to the strings’ vibrations and transfer the maximum amount of sound; its what makes a “lively” instrument.

P1040412

The process goes as before, although I can’t use the flat bottomed block planes this time on the concave surface. A finish sanding and we’re ready to cut the f-holes and brace the top, before gluing it to the sides.

P1040413

I definitely need to get a padded glove for my planing hand before working on the maple back.

Bend to my will

Posted in Acorn House on May 15, 2016 by acornhouseworkshop

I do all of my bending on a heated pipe, in the traditional way. Of course, that means sometimes, when dealing with more figured wood, there are some casualties. Not all wood wants to cooperate.

I’m currently working on a mandola build (a mandola is the next size up from a mandolin, similar to a viola vs. a violin.) The back and sides will be curly maple. The wood that I had acquired was big leaf maple, a west coast variety that is often highly figured. But, sometimes those curls are the worst parts to try to bend, especially when trying to do a tighter bend. So it was with the side stock I had. I started with the tight curve towards the head, and as soon as I started to get get close to the diameter I needed, a seam started to open up, right at a curl. I had extra length so I tried again, and again, and again. Same story. On the last one, I thought it wasn’t too bad and finished all of the other curves and clamped it into the form. After a couple of days I checked on it. Sure enough, the last time through that tight radius, the curl had started to split. Also, the more gentle curves were not flowing; the wood just didn’t want to bend. Looking closely, I could see that the piece had too much runout — the grain didn’t go parallel to the board, but rather at an almost 30° angle, which was where the splits were following.

P1040385

As pretty as the wood was, it was never going to form a nice curved mandola rib, no matter how I cajoled it or tried to force it. It was too set in its ways.

So, I looked through my supplies and picked out another board of curly maple; milled it up, thicknessed it, and got the pipe hot, ready to bend. This time, as I worked on the tight curve, it flowed like butter, easily curving into shape. Both sides were bent and clamped into the form in no time.

P1040381

This wood was a lot more flexible and open to reason; and a lot more useable.


Kinda like some people.

%d bloggers like this: