Hidden beauty
With the rosette in, work begins on the other side of the soundboard, the side that actually means something. First, the soundboard needs to get it (almost) final thicknessing (the final prep for finishing will take a little more off.) My goal is a nice light 2.5mm, thin enough to become translucent under light, but not thin enough to lose its structure. (Sorry America, the classical guitar world uses the metric system exclusively.) This will vary according to the stiffness of the wood.
Then the bracing pattern can be drafted underneath. The standard classical guitar bracing pattern was established in the middle of the 19th century by Antonio de Torres; with luthiers adding their own variations ever since. Recently there has been some completely different designs, but the classic is still the most widely used. I will be following a combination of Jeffrey Elliott and Robert Bouchet, both of whom derive from Torres’. The first component to go on is the soundhole reinforcement. That big hole is the biggest weak spot in the top, especially with half of its thickness being taken by the rosette, so it is critical that it be supported.

Everything else has to be done in order, since there will be some parts that will be going over other parts. The next critical reinforcement is under where the bridge goes. While there is much less tension with a classical’s nylon strings, vs. a steel string guitar, there is force aplenty to pull the soundboard into distortion. So, on goes the bridge plate.

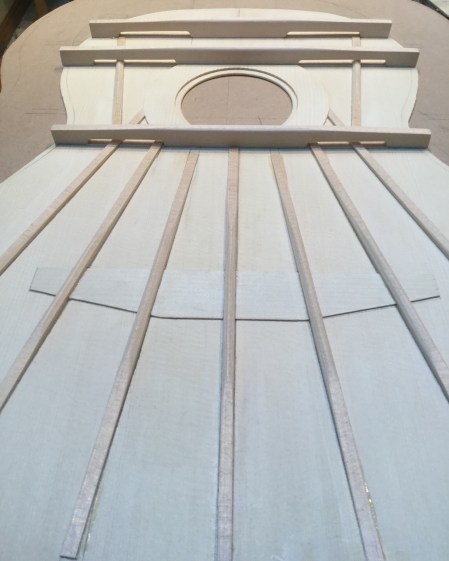
One element that both Elliott and Bouchet have in common in their designs, is open harmonic bars, basically open ares in the upper horizontal bars. (Something that Torres also experimented with.) However, these openings can then be a point of weakness, so one innovation that Elliott devised, was to place very thin strips at these openings. Being only 0.5mm thick, they do not inhibit any vibrations, but they add enough reinforcement to counteract that weakness. They are almost as thin as the fine pencil lines.

So, these are next to go on.

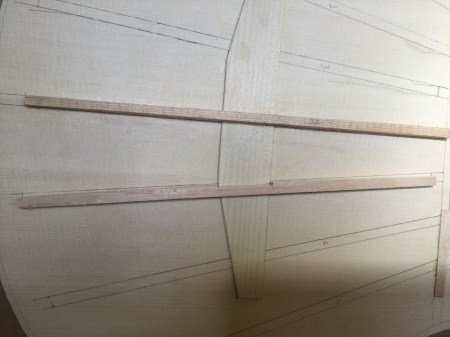
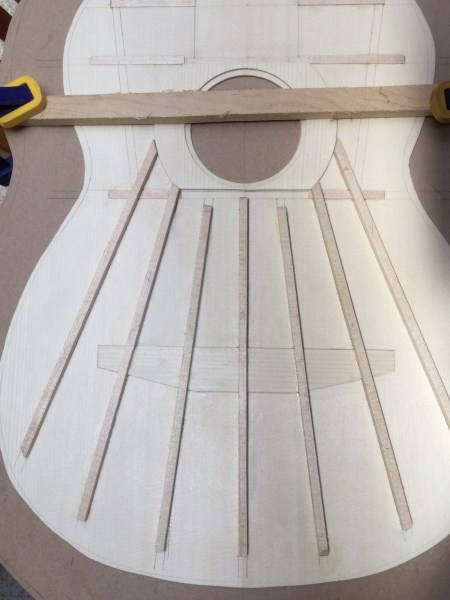
With those on, the fan braces can be added. I drew them to radiate from the point at the 12 fret where the neck joins the body. They will cross over the first bits wherever they intersect. They are 6mm wide, and will range from 6.5mm to 5mm high. While classical and acoustic guitars appear to be flat on top, there is actually a slight rise at the bridge. This dish is built into the workboard as a concavity, and each fan brace must be be fitted to match it. Compare the shape of the fitted brace, with the straight drawn line next to it and you can see this radius.
With each brace crossing the dish from a different angle, the individual fitting is the most time consuming. After conforming to the dish, they are then notched to over the bridge plate and thin reinforcement strips. Eventually, all 7 are glued on. (I’m using hot hide glue for all of the bracing, by the way.)
Out come the wee little planes and paring chisel to shape the fan braces, starting with the planned heights, then profiling them, finally ramping them down on each end.


The two upper fans are next; fitted, glued, and carved.
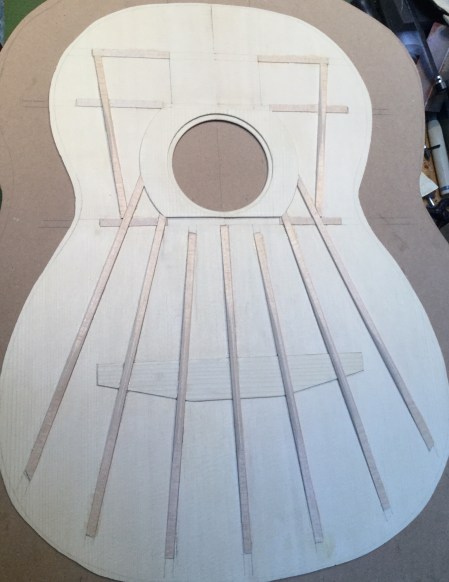
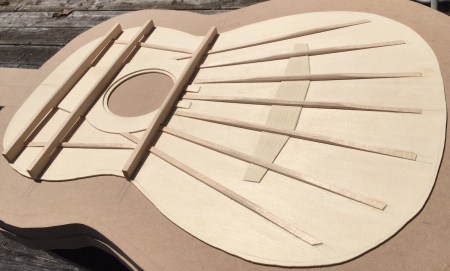
Now the open harmonic bars can go on. The open areas allow vibrations to go into the upper part of the guitar while providing the strength under the fingerboard. They are notched to go over the tips of the thin reinforcement strips.
A couple of other reinforcements, and the bracing is done. A light, but strong, under structure that will, sadly, never be seen by most.
Siding next.

Leave a comment