Electrons and wood
This winter I tackled something a little different; off-topic, yet still on-topic. With all my other self made musical gear, I still needed somebody else’s amplifier to push it through (at least on the electric side.) So, with a very cold and snowy winter keeping me in the house, I tackled that final link in the chain: building a tube amplifier!
Now, I don’t pretend to know half of the electrical engineering knowledge it takes to design a guitar amplifier from scratch, so I decided to get my feet wet with one of the many amp build kits that are available. Typically, new builders start with a Fender Tweed Champ design from the ’50s, one of the simplest designs around (and yet still very useable. Its what Clapton recorded Layla with!) But, I already had that sound covered in my stable. So, I went looking for a kit that took after Marshall’s early 18w Plexi amps from the mid-60s, able to go from crystal cleans at low volumes to crunchy overdrive when pushed harder. There were a number of companies that had one, but I ended up going with a U.K. outfit (Ampmaker) for price (even with int’l. shipping and tariffs it was cheaper than most of the U.S. kits), quality of components (hey, when making a British amp, why not British parts!), and, most of all, one of the best instruction manuals I’d seen (critical for a total novice.)
I got my tools collected and got to work, learning to solder along the way. I won’t go into the tech details (this is a woodworking blog, after all!), but here are some shots of the process.
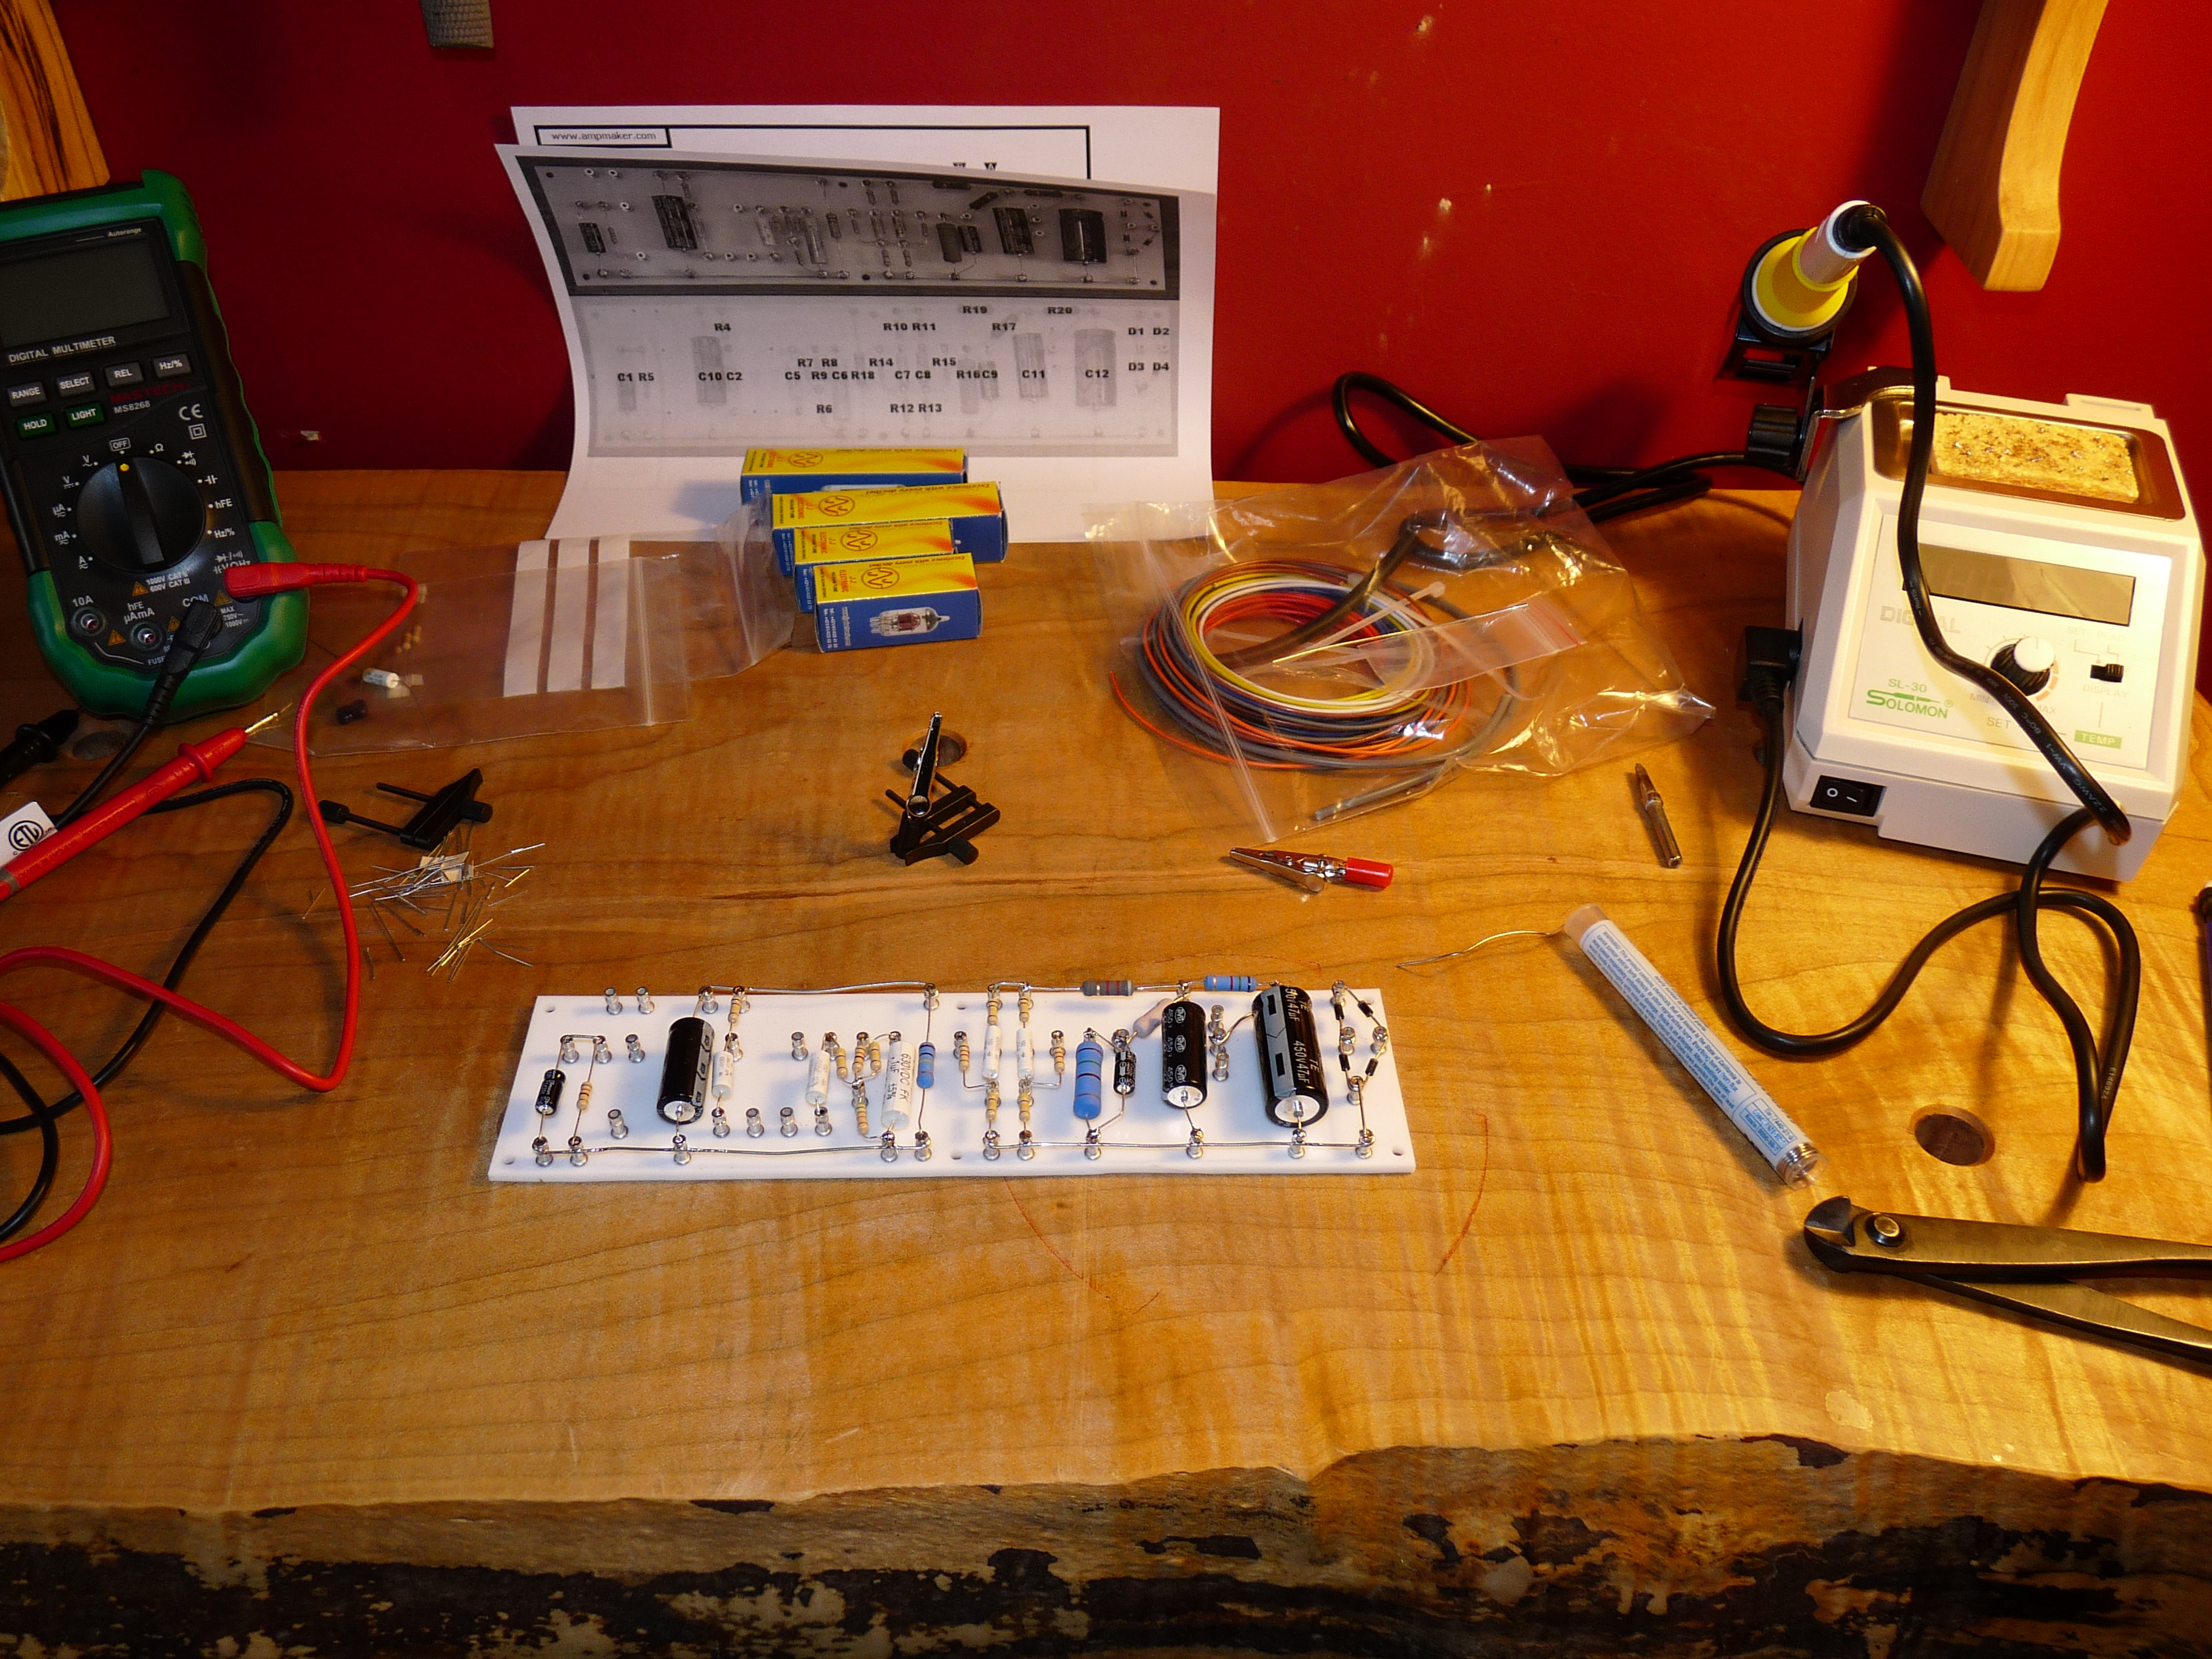
The various capacitors and resistors soldered onto the turret board.

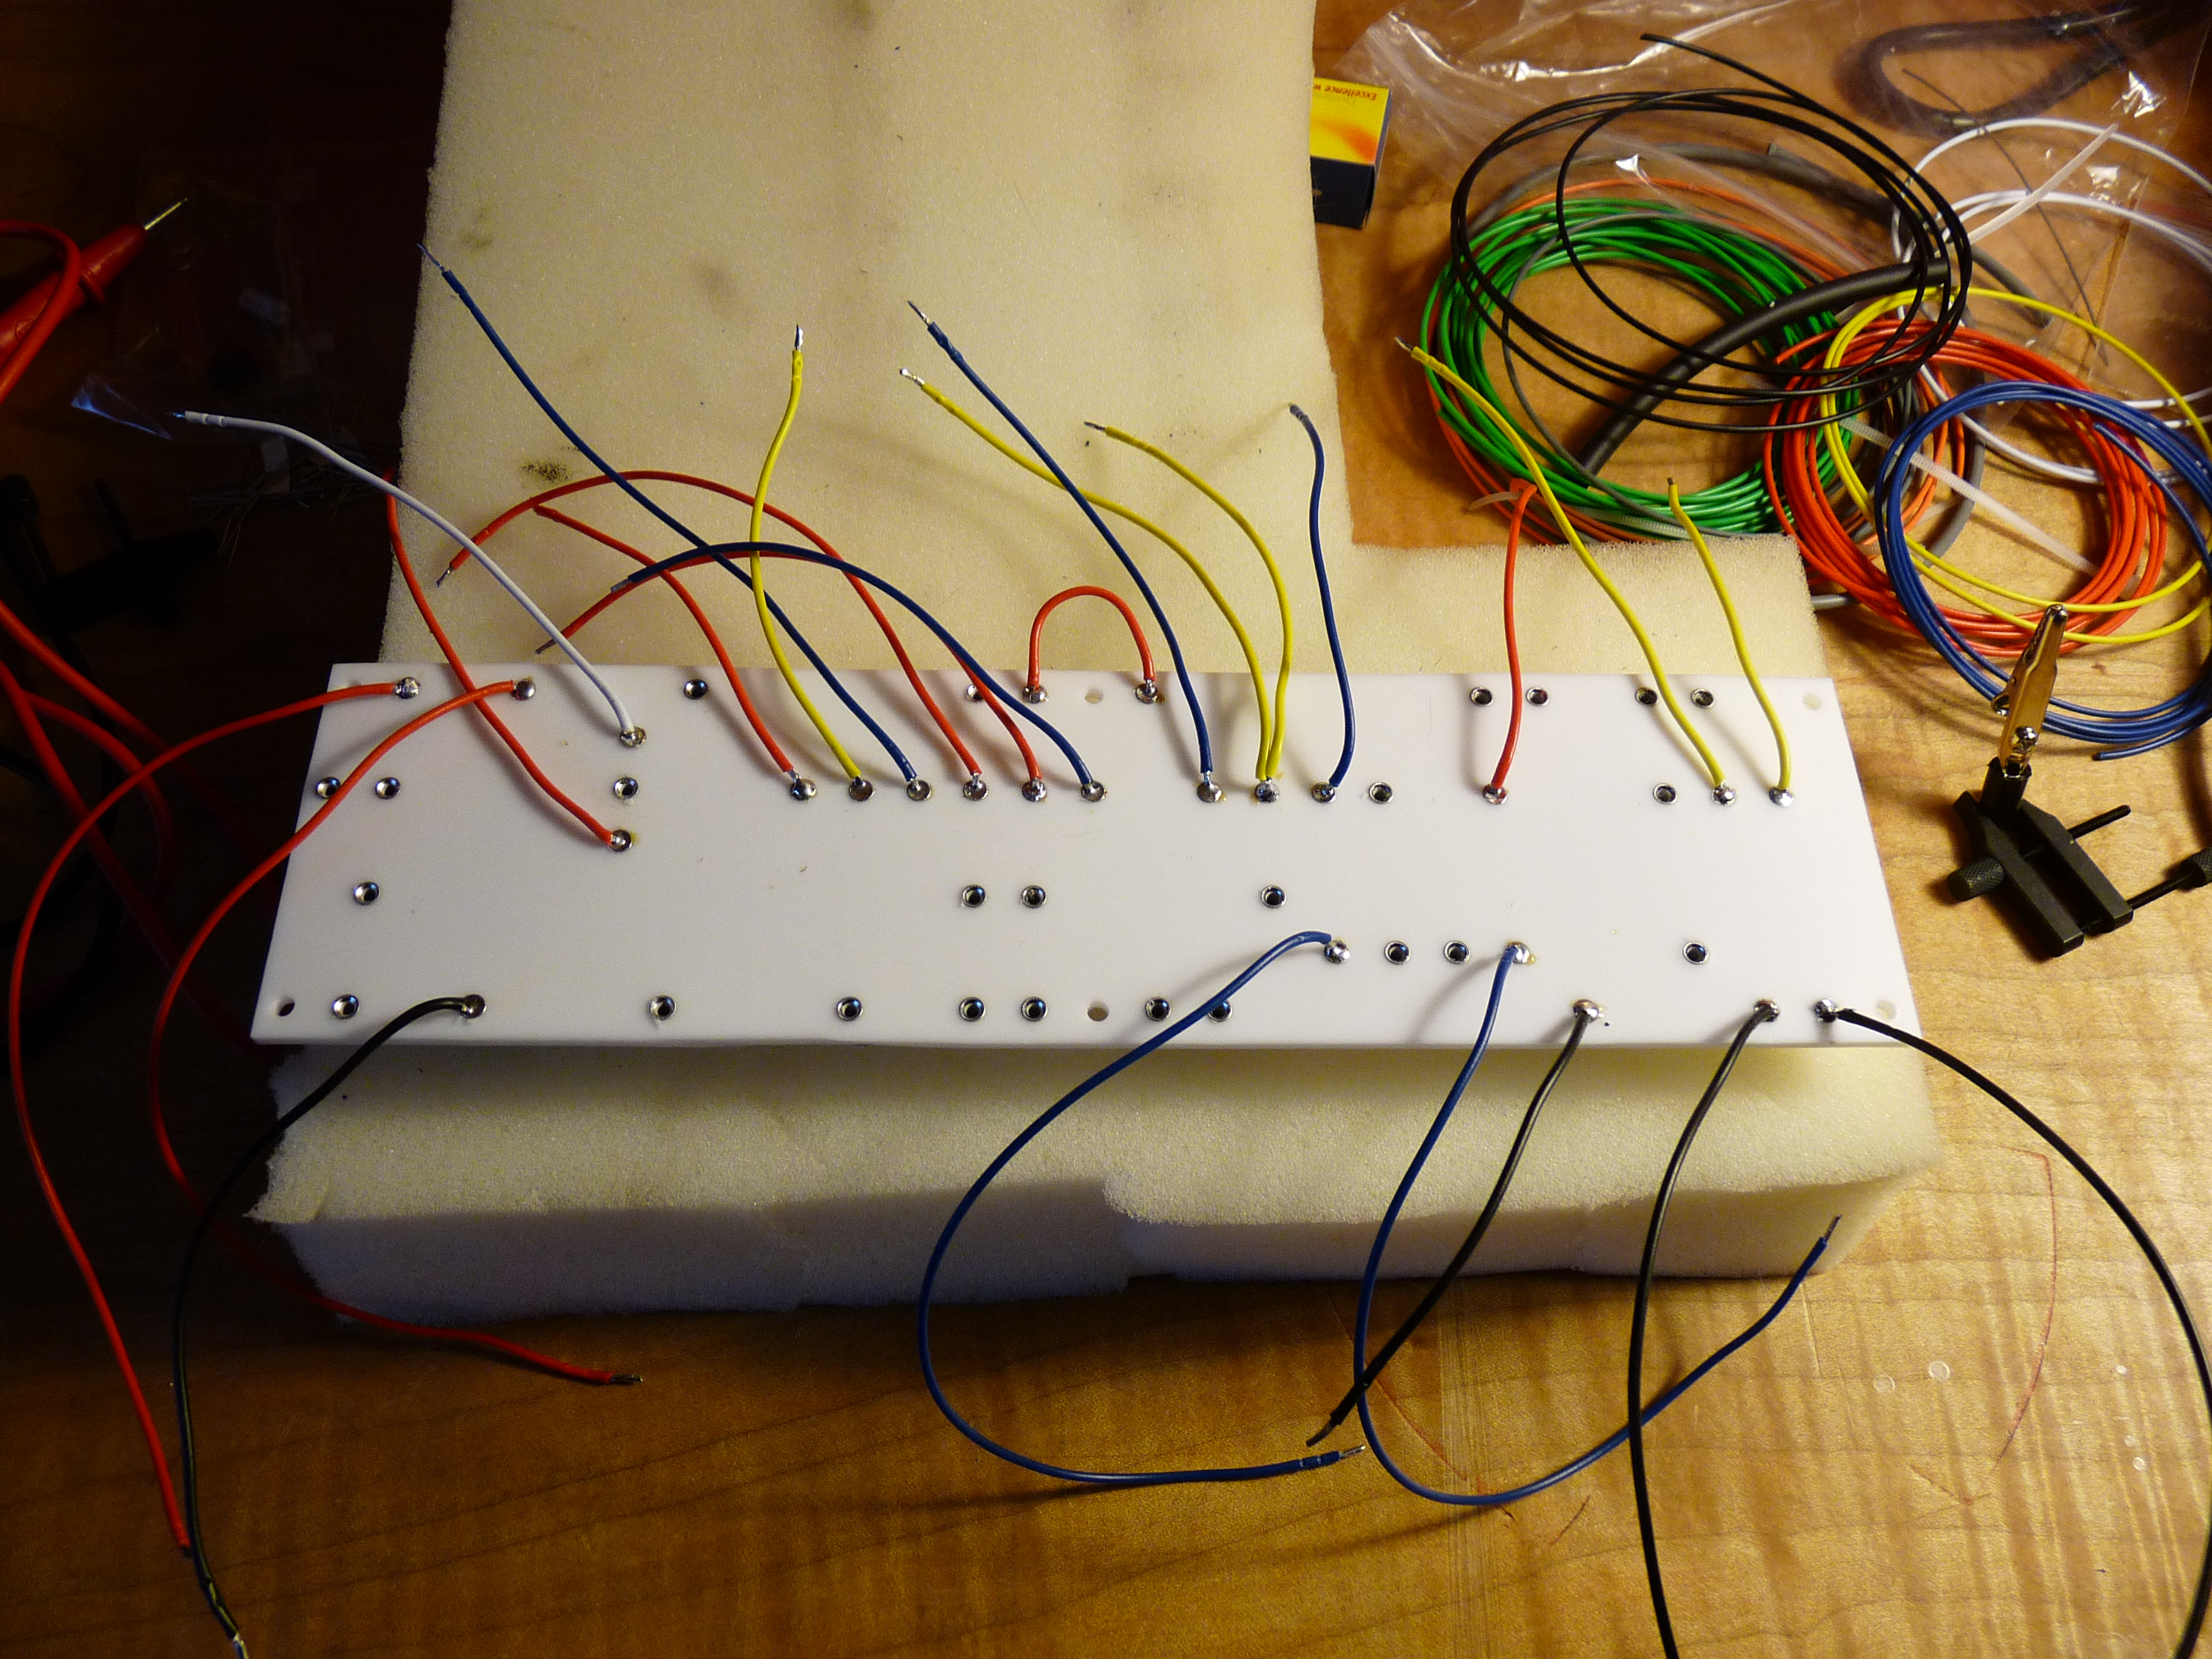
Leads attached to the bottom of the turret board. (Definitely had to label these before I put the board in the chassis!)
The turret board installed in the chassis, and the first wires connected to the tube sockets.
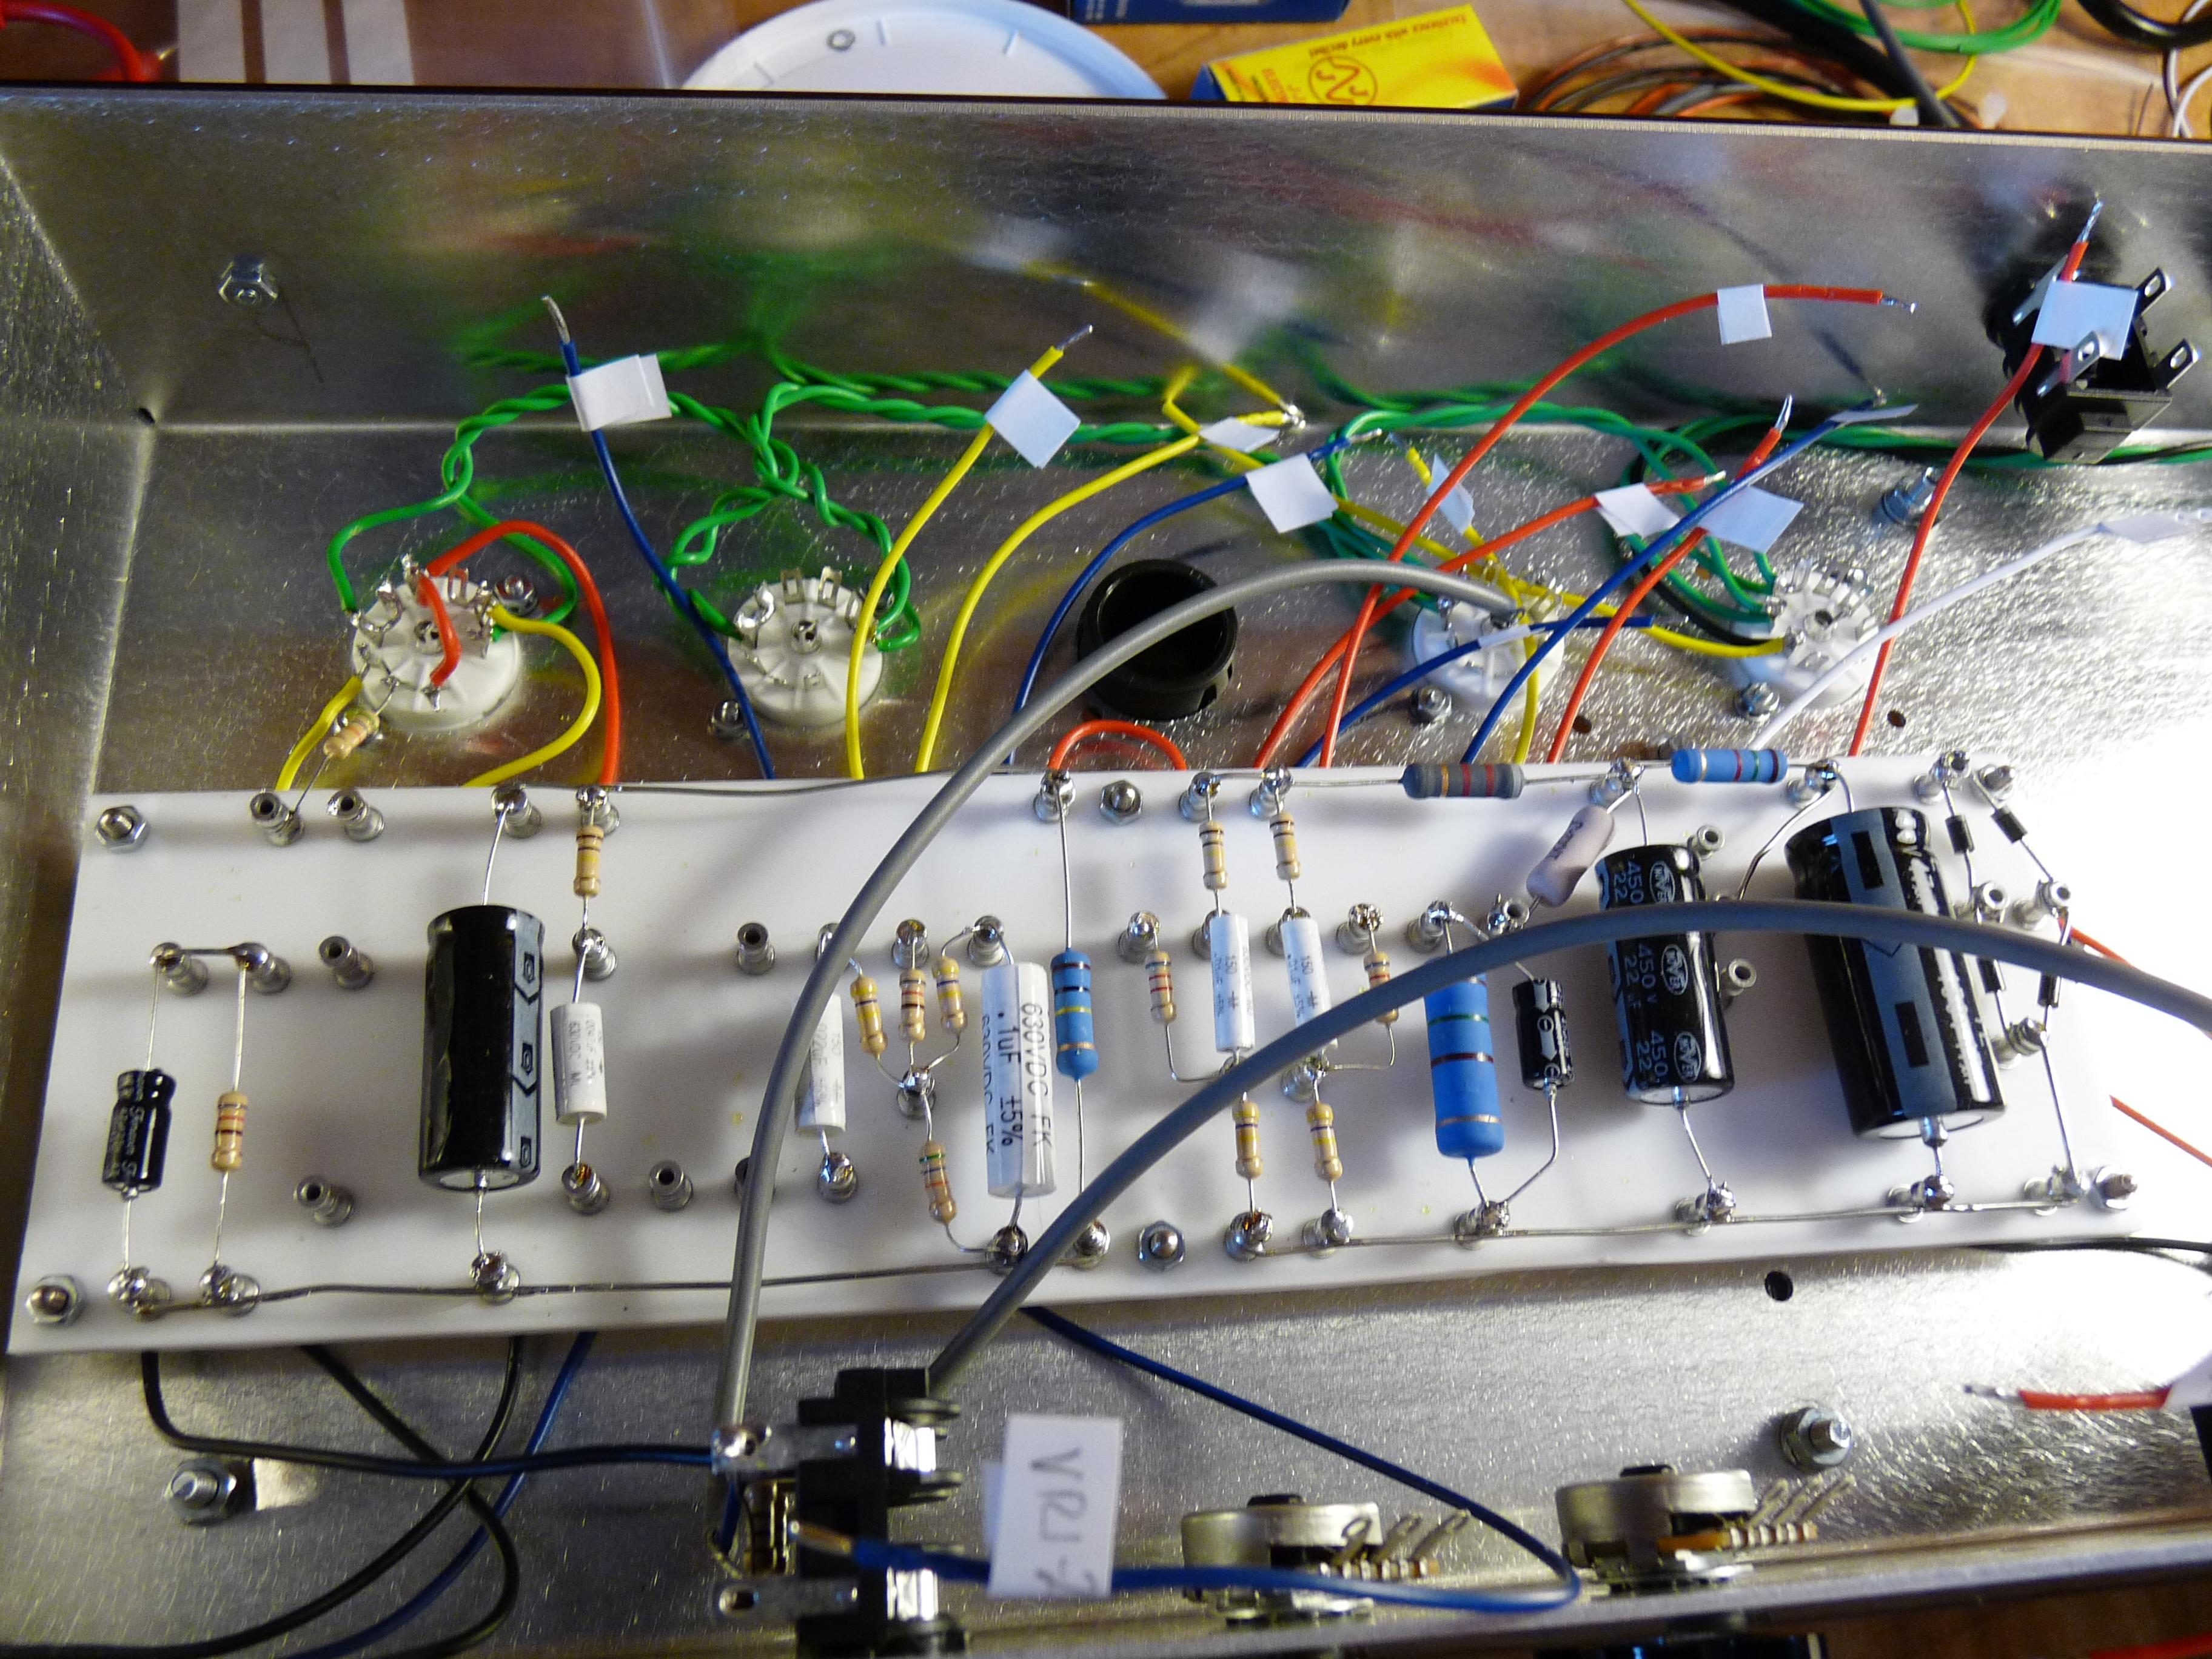
All of the socket, switch, and input connections made.

Transformers wired in. The completed innards!

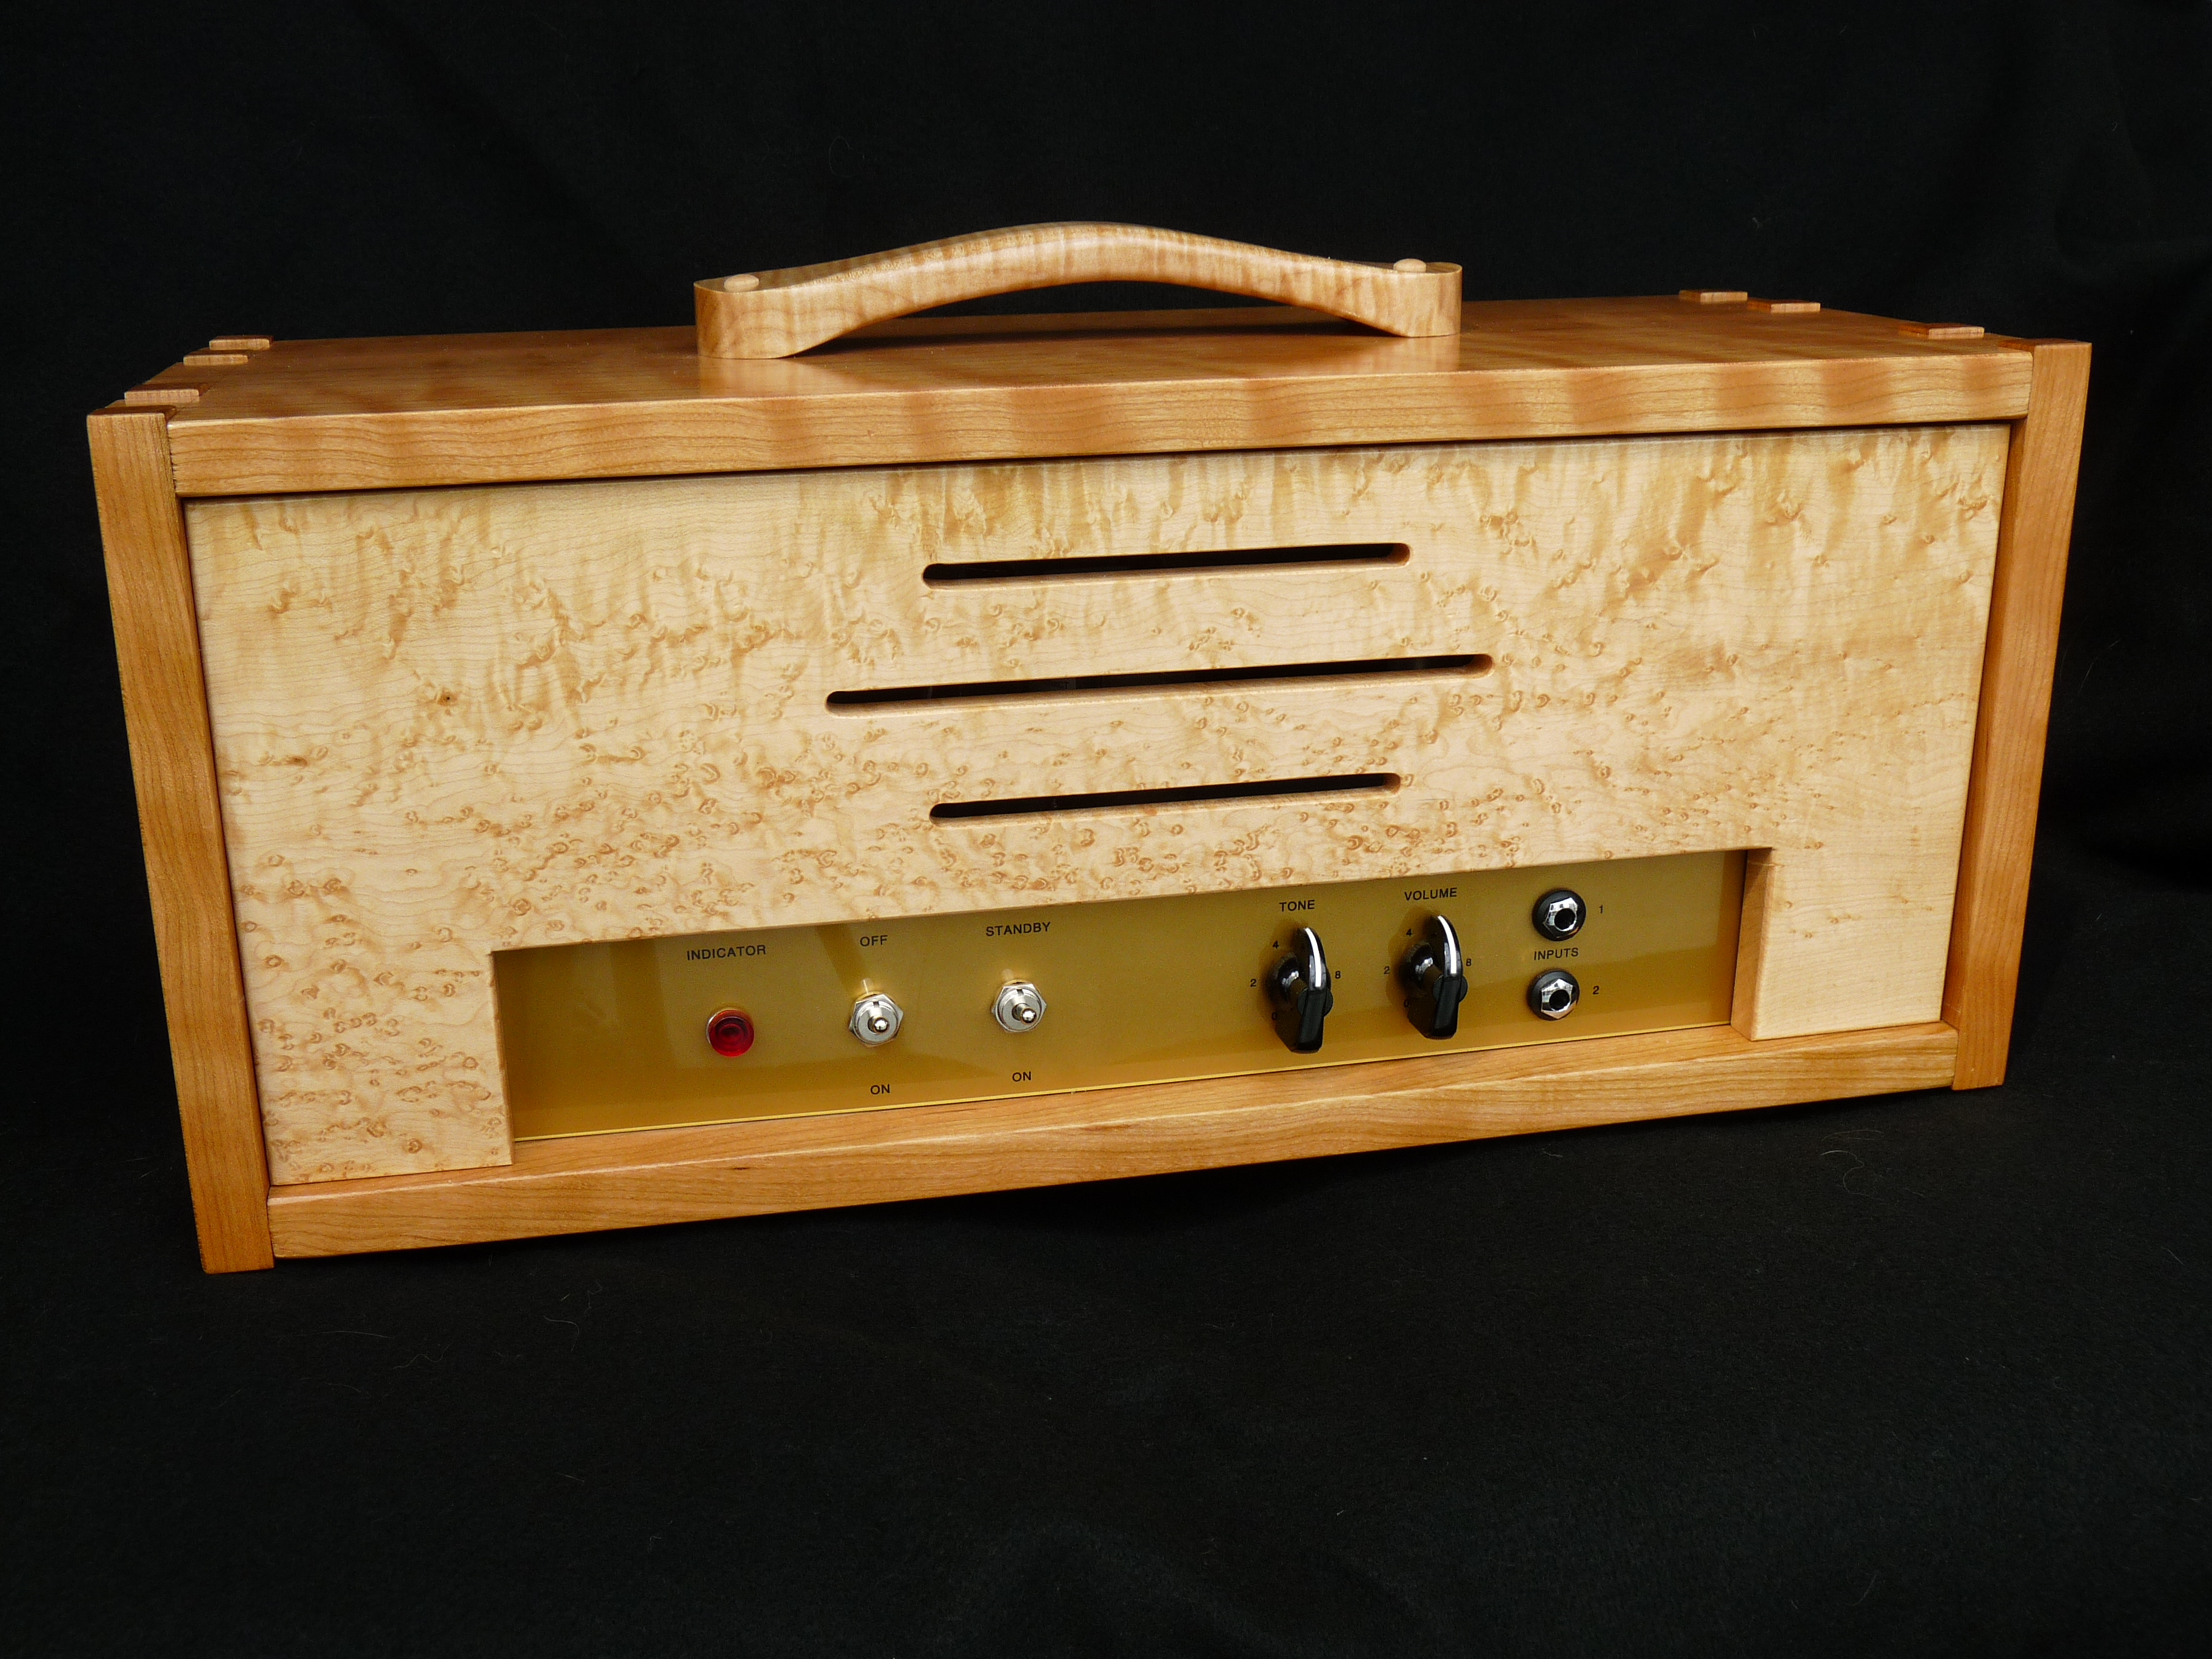
In the end, after doing some careful testing (both un-powered and powered), I ended up with an amp that sounds as good, if not better, than what you can buy in the stores. But, it needed a home. Bolted to a piece of plywood was not only inelegant, but potentially dangerous, with the high voltages transformers waiting to zap a careless hand.

So, I built a cabinet for it, using some curly cherry and birdseye maple I had. Green & Green inspired lightly protruding finger joints provide the structure, with a curly maple handle to provide portability. A good project to warm up my WW’ing chops, after the winter break.
Here’s a quick clip of what it sounds like.
(O, and Happy 100th post to me, btw!)

Leave a comment