In a Bind
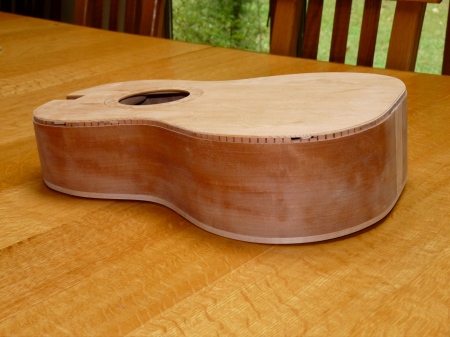
Of all the various tasks and challenges in building an acoustic guitar, this one has to be my most feared and hated: the binding. In order to hide the join of the top and back to the sides, and to offer some protection from the inevitable bump, guitars have bindings around the edges, with, or without, extra purflings (thin, decorative strips of white and black layers, or sometimes a herringbone or abolne inlay). In order to add the bindings, you have to rout out a channel, parallel to the sides, on a top and bottom that is not at a 90 degree angle to the side, and, in the case of the back, a changing angle. Also, since you are routing around the entire body, you end up routing against the grain a number of times. And that means dealing with tearout, and trying my best to avoid it. I put on a couple of wash coats of shellac, and that seems to have helped. Although, I did get a major grab on the end graft, and had to redo it, but that wasn’t too bad, and I like the new, wider end graft better.

The top actually has two routs for the binding and purfling channels. Routing spruce, especially against the grain (using a climb cut), leaves a rough surface that requires more handwork. I may try to handcut the top channel on the next one, using a specialist tool called a gramil (although, I’ve seen reviews that talk about the difficulty of doing it by hand). You can see why you need kerfing to glue the top and bottom on: after routing the binding channels, you wouldn’t have any side left to hold the top on, otherwise!

Since I am using maple bindings (as opposed to the plastic ones used by most of the big, mass market, companies), they need to be prebent on the bending iron. This is much easier than bending the sides. I taped three strips together (always good to have extras) for each side, spritzed them with a little water, and hit the iron. They were done before I knew it, and after clamping them in the form to dry, they were ready to go.

The shape of the guitar dictates another specialist tool to clamp the bindings after glueing: tape! Actually, this is a special tape, available at luthier supply stores, that is tearable by hand, but strong enough to stretch and hold fast, yet come off clean. Painter’s tape wont work here. Just make sure to tear off a lot of strips BEFORE glueing; time is of the essence.

Here in the mortise, you can see the ends of the binding and purfling strip. On the bottom, I just used the maple binding strip. On fancier guitars, made by people with a LOT more experience than me, they may add purfling beneath the binding, on both top and bottom, as well as fancier, and multiple, inlays on the top. I’m going to keep it simple, for now.

When it is dried I will scrape and sand it flush, and then prepare the guitar for the finishing room.
In the final stretch now!
October 1, 2009 at 12:11 pm
I don’t know If I said it already but …Hey good stuff…keep up the good work! 🙂 I read a lot of blogs on a daily basis and for the most part, people lack substance but, I just wanted to make a quick comment to say I’m glad I found your blog. Thanks,)
A definite great read..Jim Bean